NodeMcu and Arduino IDE
NodeMCU is an eLua based firmware for the ESP8266 WiFi SOC from Espressif. The firmware is based on the Espressif NON-OS SDK and uses a file system based on spiffs. The code repository consists of 98.1% C-code.
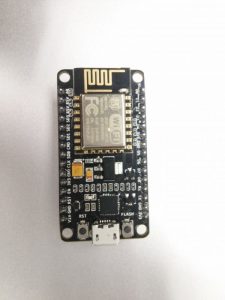
The NodeMCU firmware is a companion project to the popular NodeMCU dev kits, ready-made open source development boards with ESP8266-12E chips.
ESP8266 Arduino Core
As Arduino.cc began developing new MCU boards based on non-AVR processors like the ARM/SAM MCU and used in the Arduino Due, they needed to modify the Arduino IDE so that it would be relatively easy to change the IDE to support alternate tool chains to allow Arduino C/C++ to be compiled down to these new processors.
Some creative ESP8266 enthusiasts have developed an Arduino core for the ESP8266 WiFi SoC that is available at the GitHub ESP8266 Core webpage. This is what is popularly called the “ESP8266 Core for the Arduino IDE” and it has become one of the leading software development platforms for the various ESP8266 based modules and development boards, including NodeMCUs.
Advantages of NodeMCU platform relative to the Arduino
- Low cost
- Integrated support for WIFI network
- Reduced size of the board
- Low energy consumption
Disadvantages
- Need to learn a new language and IDE
- Reduced pinout
- Scarce documentation
The NodeMCU programming can be as easy as in Arduino. The main difference is in the pinning of the board, described below:
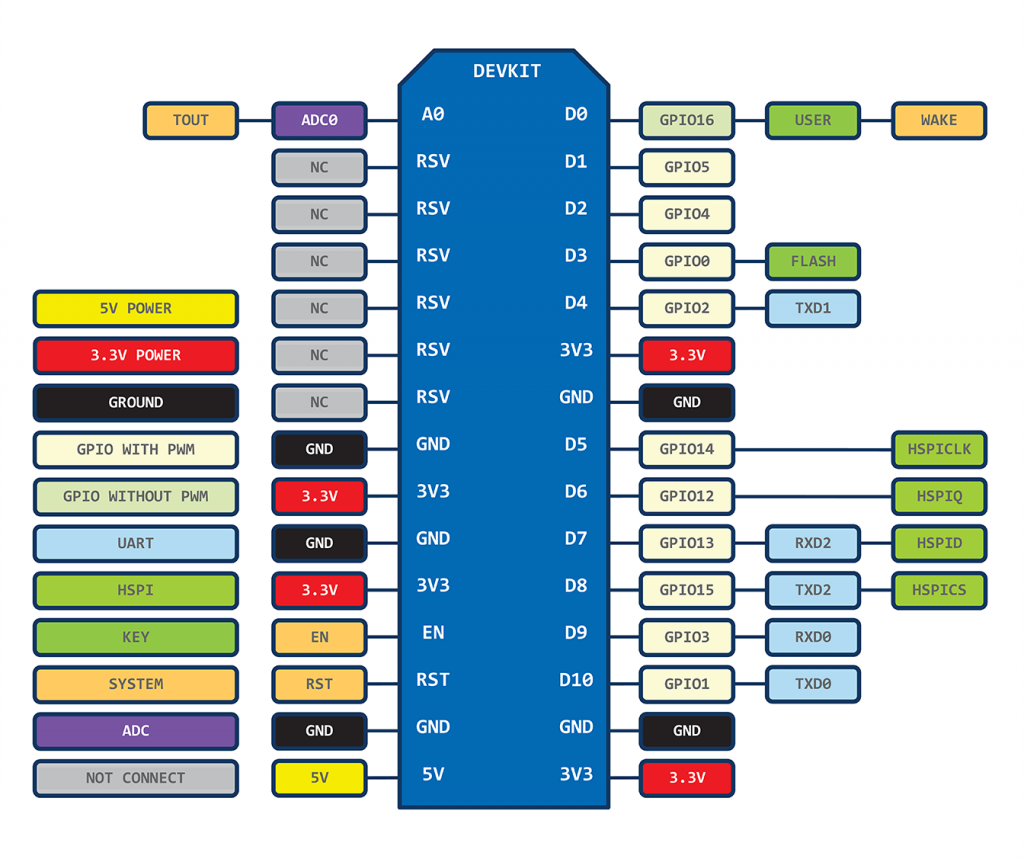
There are 6 extra GPIOs. All of them can be programmed as PWM, I2C, 1-wire, except for GPIO16 (D0).
The NodeMCU project uses the SPIFFS filesystem to store files in the flash chip. The technical details about how this is configured can be found here.
Getting Started with NodeMCU
Before using the IDE, install the USB driver in the operating system, which may be the CH340 or CP2102, depending on the board version.
Arduino IDE
- Before using the IDE, install the USB driver in the operating system, which may be the CH340 or CP2102, depending on the board version.
- Run the Arduino IDE. If it has not been installed, do so here: https://www.arduino.cc/en/Main/Software
- Open the Preferences window and type in the “Additional Board Manager URLs” the following address: http://arduino.esp8266.com/stable/package_esp8266com_index.json
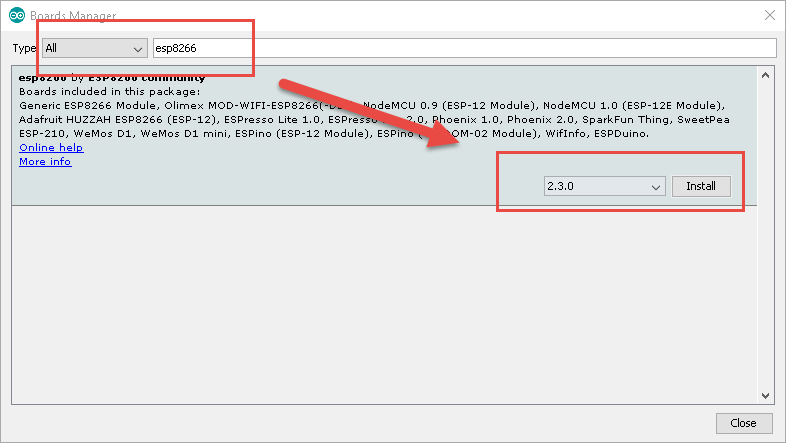
- Open Board Manager menu and type esp8266 and install.
- On the Tools menu, configure your board according to the model you are using. The most common options are:
Board: NodeMCU, according to its model
CPU Frequency: 80 MHz
Upload Speed: 115200
Note: When you use the NodeMCU board with the Arduino IDE, the Lua firmware will be deleted and replaced by the sketch. If you want to use the Lua SDK again, will be necessary “flashing” the firmware again.
Esp8266 Spiffs File System
Arduino plugin which packs sketch data folder into SPIFFS file system image, and uploads the image to ESP8266 flash memory.
Installation:
- Make sure you use one of the supported versions of Arduino IDE and have ESP8266 core installed.
- Download the tool archive from releases page.
- In your Arduino sketchbook directory, create tools directory if it doesn’t exist yet.
- Unpack the tool into tools directory (the path will look like<home_dir>/Arduino/tools/ESP8266FS/tool/esp8266fs.jar).
- Restart Arduino IDE.
Usage:
- Open a sketch (or create a new one and save it).
- Go to sketch directory (choose Sketch > Show Sketch Folder).
- Create a directory named dataand any files you want in the file system there.
- Make sure you have selected a board, port, and closed Serial Monitor.
- Select Tools > ESP8266 Sketch Data Uploadmenu item. This should start uploading the files into ESP8266 flash file system. When done, IDE status bar will display SPIFFS Image Uploaded message. Might take a few minutes for large file system sizes.
Example Codes
Arduino like IO access
pin = 1
gpio.mode(pin,gpio.OUTPUT)
gpio.write(pin,gpio.HIGH)
gpio.mode(pin,gpio.INPUT)
print(gpio.read(pin))
</pre>
Blinking Led
<pre class=”lang:default decode:true” title=”BootReceiver.class”> lighton=0 tmr.alarm(0,1000,1,function() if lighton==0 then lighton=1 led(512,512,512) — 512/1024, 50% duty cycle else lighton=0 led(0,0,0) end end)
Connect to MQTT Broker
-- init mqtt client with keepalive timer 120sec
m = mqtt.Client("clientid", 120, "user", "password")
-- setup Last Will and Testament (optional)
-- Broker will publish a message with qos = 0, retain = 0, data = "offline"
-- to topic "/lwt" if client don't send keepalive packet
m:lwt("/lwt", "offline", 0, 0)
m:on("connect", function(con) print ("connected") end)
m:on("offline", function(con) print ("offline") end)
-- on publish message receive event
m:on("message", function(conn, topic, data)
print(topic .. ":" )
if data ~= nil then
print(data)
end
end)
-- for secure: m:connect("192.168.11.118", 1880, 1)
m:connect("192.168.11.118", 1880, 0, function(conn) print("connected") end)
-- subscribe topic with qos = 0
m:subscribe("/topic",0, function(conn) print("subscribe success") end)
-- or subscribe multiple topic (topic/0, qos = 0; topic/1, qos = 1; topic2 , qos = 2)
-- m:subscribe({["topic/0"]=0,["topic/1"]=1,topic2=2}, function(conn) print("subscribe success") end)
-- publish a message with data = hello, QoS = 0, retain = 0
m:publish("/topic","hello",0,0, function(conn) print("sent") end)
m:close();
-- you can call m:connect again
Spiffs File System
#include"FS.h"
void setup() {
Serial.begin(115200);
bool ok = SPIFFS.begin();
if (ok) {
Serial.println("ok");
boolexist = SPIFFS.exists("/index.html");
if (exist) {
Serial.println("The file exists!");
File f = SPIFFS.open("/index.html", "r");
if (!f) {
Serial.println("Some thing went wrong trying to open the file...");
}
else {
int s = f.size();
Serial.printf("Size=%d\r\n", s);
// USE THIS DATA VARIABLE
String data = f.readString();
Serial.println(data);
f.close();
}
}
else {
Serial.println("No such file found.");
}
}
}
void loop() {
// put your main code here, to run repeatedly:
}